 ۱۴۰۵/۰۸/۲۶
چگونه با هوش مصنوعی عکس سینمایی بسازیم؟
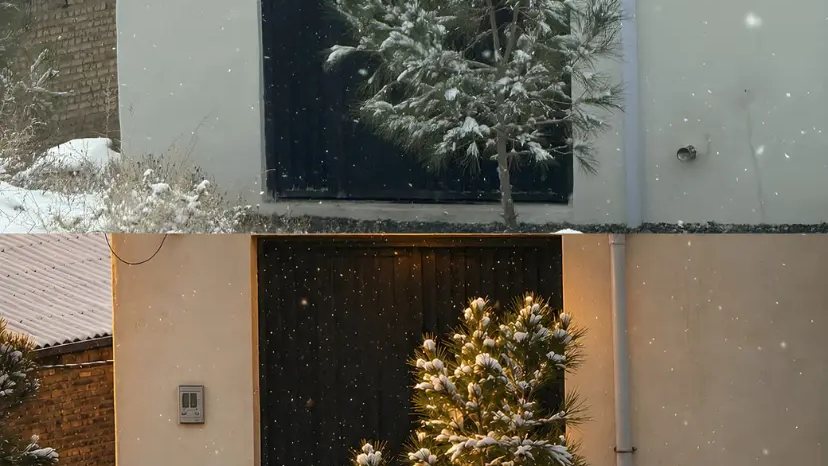
برای استفاده از این روش، ابتدا عکس موردنظرتان را در ChatGPT یا ابزار هوش مصنوعی دارای قابلیت ویرایش تصویر آپلود کنید. سپس پرامپت زیر را همراه عکس ارسال کنید.
Apply professional cinematic color grading to the attached reference image, using a warm, atmospheric, golden-hour cinematic photography aesthetic. - Preserve existing atmospheric haze and natural environmental depth. - Enhance the separation between foreground, midground, and background. - Maintain a subtle cinematic glow around naturally illuminated areas. - Keep the atmosphere realistic, organic, and slightly moody. 5. Image Quality & Texture - Preserve original photographic details, textures, sharpness, and composition. - Maintain realistic skin tones and natural object colors. - Avoid excessive saturation, artificial HDR, oversharpening, or aggressive clarity. - Retain natural photographic grain and tonal transitions. IMPORTANT PRESERVATION RULES: Use the attached image as the only source image. Do not recreate, redesign, replace, or modify any objects, people, faces, clothing, architecture, vegetation, or background elements. Do not change the camera angle, framing, perspective, composition, or lighting direction. FINAL RESULT: A professionally color-graded cinematic photograph featuring deep emerald forest greens, warm golden sunlight, earthy midtones, rich shadows, subtle atmospheric depth, and a beautiful golden-hour film aesthetic. The result should look like a photograph professionally graded by an experienced cinematographer using DaVinci Resolve, not an AI-generated recreation.
- عکس باکیفیت انتخاب کنید. تصویری که جزئیات کافی در بخشهای روشن و تاریک داشته باشد، امکان تنظیم طبیعیتر رنگها را فراهم میکند.
- به نور عکس توجه کنید. این پرامپت برای ایجاد حس نور گرم ساعت طلایی طراحی شده است. اگر تصویر اولیه نور بسیار سرد یا تختی داشته باشد، ممکن است نتیجه بهاندازهی عکسهایی با نور طبیعی گرم باورپذیر نباشد.
- از تصاویر طبیعت شروع کنید. جنگلها، پارکها و مناظر دارای پوشش گیاهی میتوانند رنگهای سبز زمردی و سایههای عمیق موردنظر پرامپت را بهتر نشان دهند.
- جزئیات تصویر نهایی را بررسی کنید. ممکن است مدل بهجای اصلاح رنگ، بخشهایی از تصویر را دوباره تولید کند یا بافت چهره و اشیا را تغییر دهد.
اگر پس از اجرای پرامپت احساس کردید تصویر بیش از حد نارنجی یا تیره شده است، میتوانید عبارت Reduce the intensity of warm tones and preserve natural exposure را به دستور اضافه کنید تا از مدل بخواهید شدت رنگهای گرم را کاهش دهد و نوردهی طبیعی را حفظ کند.